Coffee is an essential part of life for so many people. There’s no functioning in the morning without it. But what is the best way to make coffee? How can you get the most out of those delicious beans?
In truth, there really is no one best way to make coffee, but there might be a way to make coffee that is best for you. There are different factors involved in every way of making coffee that can help you determine which one will fit best in your life.
The 13 ways of making coffee we will be discussing in this article fall into 6 different brewing methods that cover a variety of tools that can be used in making coffee.
Disclaimer: Hi! this post may contain affiliate links which will take you to online retailers that sell products and services. If you click on one and buy something, I may earn a commission, see my Affiliate Disclosure for more details.
6 Different Methods of Brewing Coffee:
- Instant Coffee
- Single Serve Coffee Maker
- Immersion Brewed Coffee
- Pour Over of Drip Brewed Coffee
- Pressure Brewed Coffee
- Boiled Coffee
Within these 6 categories are more options than you probably care to research. That’s okay, we did it for you! Keep on reading to learn all about these different methods of making coffee and how they can fit into your routine.
Instant Coffee
Instant coffee is exactly what it sounds like. You don’t need any fancy machines to get the caffeine you require. All you have to do is mix the powder with water and you have your coffee.
Unlike other methods of making coffee, you can’t decide on the grounds. This coffee has already been roasted and then dehydrated to make the powder that is so easy to use.
How to Make Instant Coffee:
- Heat up your water in the microwave or on the stove until the point just before it starts to boil.
- Check the label on your instant coffee to see how much you should add to your water. Most often it will be 1 or 2 teaspoons.
- Mix the coffee with your hot water in your mug until it dissolves. Alternatively, use a small amount of cold water at the bottom of your cup to more gently dissolve the coffee before pouring the hot water on top.
- Add any desired creamer, milk, sugar, or spices to your cup of coffee.
- Stir it up and enjoy!
There are ways to jazz up your instant coffee. You can make cold brew instead of drinking it hot. You can find instructions for making your instant coffee into lattes or shakes. But at its very core, instant coffee is what it is. A very simple way to make a cup of coffee that takes the most minimal effort.
Preparation Time: However long it takes to heat up your water. Probably just a few minutes on the stove and about a minute if you stick it in the microwave.
Difficulty: Extremely Easy. There’s no real guesswork with this one.
Variety: There is a wide range of different roasts and blends available for you to purchase in instant coffee form. They are all going to be powdered coffee, but they offer a good variety of flavours for you to choose from.
Price: Since most instant coffee comes in bulk, each cup is comparatively cheap. You can make a cup of instant coffee for less than $1, which is an attractive price.
Taste: Because of the way it’s made and mixed, most people find instant coffee a rather bland option. While there are ways to spruce it up, a cup of instant coffee just isn’t going to compare to some of the other methods when it comes to having a deep, rich flavour.
Single-Serve Coffee Maker
We all know and love these things; they are our best friends in some cases. These machines are the ones you can find sitting on just about every countertop in every coffee drinking home.
The most popular single-serve coffee maker by far is the Keurig. They make your coffee by taking a pre-made cup of coffee grounds and pouring hot water through it and into your cup, resulting in the perfect amount for one cup of coffee.
These machines are the go-to for most people because they are fast and they don’t take much thought to use. The instructions for using your single-serve coffee maker will vary depending on the brand, but they are probably still pretty straightforward.
How to Use a Single-Serve Coffee Maker:
- Fill the reservoir with clean, filtered water up to the fill line.
- Turn your coffee machine on and let it heat up.
- Put a single-serve coffee cup that fits your machine in the machine.
- Place a coffee cup under the faucet to catch the coffee.
- Press the button for the coffee machine to begin making the coffee.
- Take your cup out of the machine and enjoy!
There isn’t any guesswork when it comes to making coffee using one of these machines. You don’t have to measure and grind your own coffee in order to use it. Plus there are all kinds of roasts and blends and flavours available for you to pop in whenever you are in the mood. You can even make hot chocolate using one of these babies.
Preparation Time: It generally takes a couple of minutes for these machines to heat up the water, but once that’s done you will have a cup of coffee ready and waiting for you in under a minute.
Difficulty: So Easy. You won’t find much room to mess up with a single-serve coffee maker. You don’t even really have to do any work. You just have to put in your choice of coffee and let it do it for you.
Variety: You can get a single-serve coffee maker pretty much any way you want it. They come in different sizes and colours to suit your every desire. Some of them even have options to change the amount of coffee it makes, in case you need a bigger cup.
Price: This will vary from brand to brand. You could pay $15 for a single-serve coffee maker or you could pay $150 for one. It really depends on what you need out of it. The price will change with what features are included.
Taste: There are so many different flavours you can get from a single-serve coffee maker. There are hundreds and hundreds of brews out there for you to try in different strengths. The coffee used in these machines is not freshly ground, but the convenience of the machine could make up for that. If you’re an avid coffee lover, though, it may not be quite up to your standards.
Immersion Brewed Coffee
Immersion brewed or steeped coffee is a method of brewing in which the coffee grounds are mixed directly into the water and allowed to sit for a few minutes so that the flavor of them is extracted. Once the grounds have been steeped long enough, you use a filter to separate them so that you are left with the resulting coffee.
Steeping coffee is a tried and true method to get a nice rich flavour, and it’s not extremely difficult to figure out. However, there is the risk of under or over steeping the coffee grounds, which can ruin your precious cup of coffee.
But when done right you are left with all of the natural oils and flavors of the coffee grounds that have seeped out into the water. This method leads to a unique tasting coffee that you just don’t get with other methods.
Coffee Bags
Much like tea bags, these little guys are ground coffee wrapped up in a filter bag that you soak in water. Unlike instant coffee, these bags contain actual coffee grounds and not just the powdered version, which ultimately helps to boost the flavor of your coffee.
It’s possible to make your own coffee bags if you want the taste of steeped coffee but don’t want to invest in a coffee maker to get the job done. There are also pre-made coffee bags you can purchase.
How to Use Coffee Bags:
- Boil water on the stove or in the microwave.
- Place your coffee bag in your chosen mug.
- Pour the boiling water over the coffee bag and let it sit for however long the instructions say. Usually around 60 seconds.
- Dunk the bag up and down a few times for a more developed flavor, remove from water, and discard.
- Dress up your coffee with any desired milk, creamer, sugar, or spices.
- Stir it up and enjoy!
If you are a tea lover then the process of making coffee using a bag should be fairly straightforward. This method is a good option for those of you that can’t stand instant coffee but need a way to take your coffee with you when you won’t have access to your machine.
Preparation Time: The combination of how much time it takes to boil your water plus the steeping time. Making a cup of coffee using a coffee bag should only take around 3-5 minutes.
Difficulty: Easy. If you can heat up some water and let it sit, then you’re good to go. There’s no guesswork with this method of making coffee.
Variety: This depends on if you decide to buy pre-made coffee bags or make your own. With pre-made you pretty much get what get. There are different roasts and blends you can choose from, but the grind will be the same. If you make your own then you can choose to grind your own coffee beans, giving you more control.
Price: Because most coffee bags come in bulk the cost of a cup of coffee made from coffee bags is generally less than $1. If you make your own it will depend on what type of coffee beans you buy and how many bags you can make from them.
Taste: Because this tea is steeped it will offer a deeper, finer flavor than instant coffee. However, because your coffee is not freshly ground it still won’t be the best cup of coffee you can get.
SoftBrew
The SoftBrew is a coffee pot similar to a teapot used for steeping coffee grounds in hot water. It is made up of a ceramic body and a filter for putting the coffee in. This method of steeping coffee is relatively new, but also extremely simple to work with.
How to Use a SoftBrew:
- Fill the filter with your ground coffee according to your taste. Around 2-3 scoops for a smaller pot and 6-8 scoops for a larger pot.
- Pour hot water over the filter and into the SoftBrew pot, ensuring all of the grounds are completely covered.
- Leave the coffee to brew for 4-8 minutes, depending on how strong you want your coffee to be.
- Pour your coffee into your mug like you would pour a cup of tea.
- Add any milk, creamer, sugar, or spices you might desire.
- Stir it up and enjoy!
The way the SoftBrew filter is made allows for any grind of coffee to be steeped in water without letting it into the water. This means you can even use a super fine grind if you really want that deep flavor to come through.
Using a SoftBrew may take some experimenting on your part. The flavor and strength of this steeped coffee can change depending on what kind of roast you use or how finely it’s ground. But once you find that perfect amount of your favorite coffee to add to the pot, you will find making coffee with a SoftBrew is easy as pie.
Preparation Time: The time it takes to heat your water plus steeping time. It could take anywhere from 6-10 minutes until you are enjoying your coffee.
Difficulty: Easy. The SoftBrew is a straightforward method to get a delicious cup of steeped coffee. You don’t have to fuss with any mechanics. Simply dump in your coffee and let it steep. It’s also really easy to clean.
Variety: You can typically get a SoftBrew in three sizes. You can choose from the small 17oz, the medium 28.7oz, or the large 40.5oz. They are generally made of ceramic, though there are options made from glass as well.
Price: Purchasing a SoftBrew will run you anywhere from $40 to $60 depending on the size you want.
Taste: The SoftBrew results in a deep, rich flavor that can be enhanced by using extremely fine grinds of coffee that can’t be used in something like a french press.
French Press
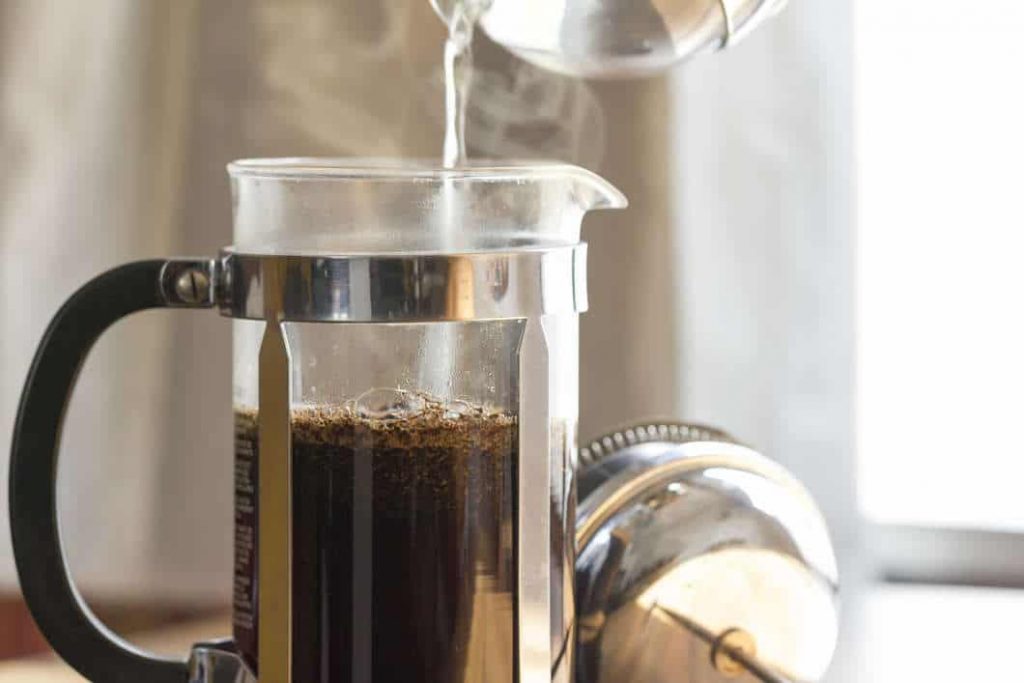

Using a french press to brew coffee is an easy way to get arguably one of the best cups of coffee brewed from home. It is one of the most loved methods of making coffee and doesn’t require a lot of time or effort to get it done.
The main part of a french press is made up of the base to keep it elevated above the surface of your counter, a beaker that is usually made of glass, and a handle to hold while you pour your coffee to prevent burns. The lid of the french press features a plunger on top which can be moved up and down to control the filter underneath.
How to Use a French Press:
- Heat your water to just below boiling – around 200 degrees.
- Measure out your desired amount of coffee grounds.
- Add the coffee to the bottom of the french press and shake to even it out.
- Pour the hot water over the coffee grounds and fill the french press.
- Stir the coffee up for about 5 seconds to get it well mixed.
- Put the lid on the french press and leave the filter pulled up above the coffee.
- Let the coffee steep for 3-4 minutes.
- Press on the plunger to lower the filter all the way to the bottom to separate the coffee grounds from the liquid.
- Pour your coffee into your cup and add any desired milk, creamer, sugar, or spices.
- Stir it up and enjoy!
There is a little more thought that goes into using a french press than some of the simpler methods of coffee making above. French press coffee is at its best when freshly ground coffee is used. You should use a burr grinder to get a consistent grind between coarse and medium. If the grind is too fine you risk far too bitter coffee.
Preparation Time: The amount of time it takes you to grind your coffee beans, heat your water, and steep your coffee. If you go the freshly ground route it will take around 10 minutes to make a cup of coffee using a french press. It also requires your full attention to prevent over steeping.
Difficulty: Fairly Easy. There are some extra care and attention required when it comes to making the perfect cup of french press coffee. However, once you have the process down you will be able to do it without even thinking. It’s not a hard system to master.
Variety: There is a good variety of french presses you can choose from. There are sizes that range from 3 cups to 12 cups depending on how much coffee you are looking to make. Although french presses are most popularly made from glass they are also available in metal, ceramic, and plastic.
Price: Getting a french press can be a bit confusing because there is so much variety in price. It’s possible to get a french press for less than $10 as well as to invest over $100 in a similar machine. A cheaper french press isn’t going to last as long as a more costly one and probably won’t work quite as seamlessly.
Taste: French press coffee has a wholely unique taste derived from the metal filter pressing natural oils from the coffee grounds. It is a robust taste that you can modify the strength of using less or more grounds in your brew. Your cup of coffee is likely to have a bit of silt at the bottom, though, so you might not want to drink that last sip.
Siphon
The siphon or vacuum pot is a flashy way to make coffee if you want to impress people with your brewing skills. It combines immersion brewing with a siphon that results in a great-tasting cup of coffee.
Even though it looks cool and tastes delicious, using a siphon pot is not an easy process. They are extremely fussy and take a lot longer to brew coffee than other methods. Because of this, it’s not really an everyday sort of way to make your coffee. Unless you’re just that determined to have the taste it provides.
How to Use a Siphon Pot:
- Pull the chain on the filter to sink it and attach the clip to the bottom of the funnel to keep it in place.
- Fill the globe with pre-heated water. Make sure the outside of the globe remains dry.
- Use a candle or butane burner beneath the globe to apply high heat.
- Place the funnel in the globe loosely so that it sits at an angle while waiting for the water to boil.
- Measure out your coffee, usually about 6 tablespoons, and grind it to a medium coarseness. It should be similar to table salt.
- When the water is boiling, attach the funnel securely to the globe.
- Once the water fills the funnel, swirl a utensil in the water to create a whirlpool and add your coffee grounds directly into the water.
- Start a timer.
- Adjust your heat to a lower setting and give the mixture a stir.
- Stir the coffee again after 40 seconds.
- After 1:30 minutes turn the heat off completely and give the coffee another big stir.
- At about 3 minutes the coffee should be completely drawn down into the globe, leaving the grounds in the funnel.
- Carefully remove the globe and pour your coffee into your cup.
As you can see, using a siphon pot to make a cup of coffee takes a lot more thought and energy just to get a single cup. It’s a neat process that is incredibly visually appealing but should probably be saved for special occasions when you want to show off a bit.
Preparation Time: It will probably take you around 6-10 minutes to brew coffee using a siphon pot. It’s safe to bet on the longer time, given all of the components required.
Difficulty: Involved. You will have to pay extremely close attention to what you’re doing here. Steps need to be followed to a T or you may not end up with the cup of coffee you were hoping for. You will also need to use an open heat source if your siphon pot doesn’t include an electric heater. They aren’t the easiest things to clean either.
Variety: With siphon pots, you pretty much get what you see. They all have a globe at the base, somewhere to put the heat under it, and a funnel over top to suck all the coffee through. They are really neat looking things, though.
Price: You could pay anywhere from $30 to $150 for a siphon pot that will sit on your counter and look good until you feel like breaking it out to brew coffee. They aren’t the best things to store and are breakable so you should be careful no matter how much you spend. Depending on the type of filter it takes you could be paying a little extra for more.
Taste: The result of using a siphon pot is a very pure and mellow cup of coffee. It is one of the cleanest ways of making coffee and leaves you with maybe one of the best tasting cups you’ll come across. Of course, it only yields this amazing cup of coffee when used correctly.
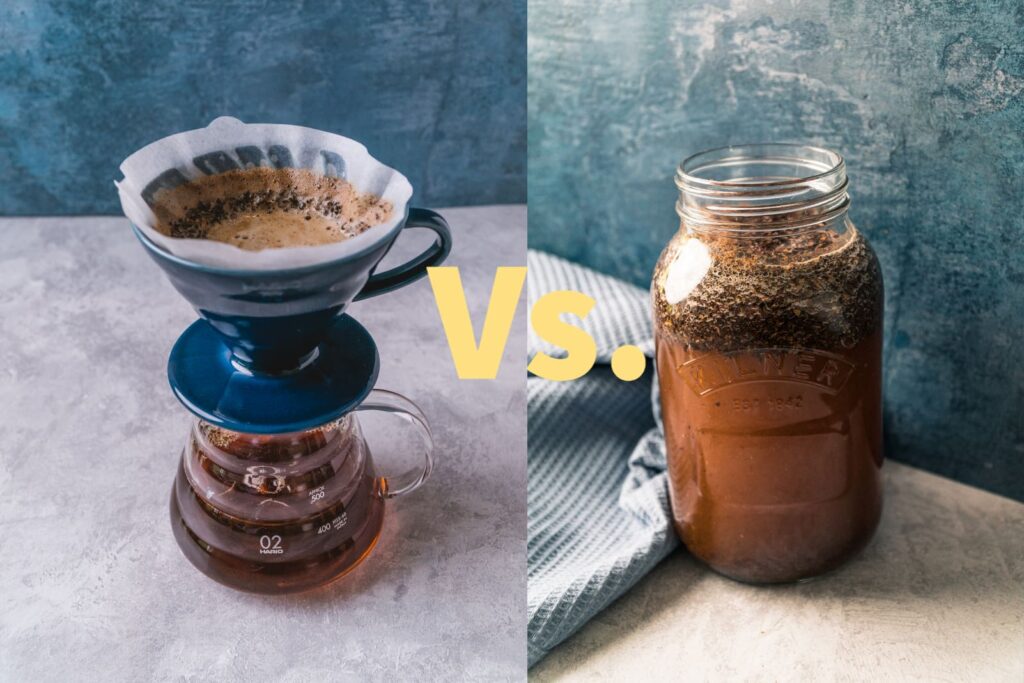
Pour Over or Drip Brewed Coffee
This sort of coffee is made by pouring water over your coffee grounds and allowing it to drip through into your cup. This is by far the most popular form of brewing coffee at the moment.
With drip brewing, your coffee grounds are always in a filter of some kind, generally a paper filter. This keeps the grounds contained while the water filters through into your cup, carrying the taste of the coffee with it.
Coffee made from drip brewing is generally much lighter in body than other methods of coffee making. This is due to the fact the water is just soaking through the coffee grounds rather than being mixed with them.
Chemex


The Chemex is a glass coffee maker that uses a paper filter at the top to filter the water through the coffee. They are beautiful tools that look good while making a delicious cup of coffee.
One of the perks of using a Chemex is the fact that it makes a good amount of coffee in every batch. You can make anywhere from 3 to 10 cups of coffee depending on how large of a Chemex you invest in.
If you’re using a Chemex to brew your coffee you’ll probably want to use a gooseneck kettle to heat and pour your water into controlling how quickly the water is poured.
How to Use a Chemex:
- Heat your water to around 205 degrees. You can do this by bringing it to a boil and then allowing it to sit off the heat for 30 seconds.
- Unfold the special Chemex filter and put it in the top of the coffee maker, ensuring the three-layered side of the filter is on the side of the pouring spout.
- Pour a bit of water around the filter to help it stay inside of the coffee maker and get rid of the paper taste. Discard the rinse water.
- Measure and grind your coffee beans to a slightly coarser than medium grind. Or just measure out your pre-ground coffee.
- Pour the coffee grounds into the filter and give it a shake to settle them.
- Pour your hot water over the coffee grounds in a sort of spiral pattern. Keep pouring until you’ve used the appropriate amount of water for your Chemex. If the water starts to reach the top of the coffee maker, stop and allow it to drain a bit before adding more.
- Once all of the water has drained through the filter, remove and discard it.
- Pour your coffee from your Chemex to your cup.
Using a Chemex is a simple and effective way to make coffee that looks pretty at the same time. It may take some figuring out to find the perfect amount of coffee for your tastes or to get just the right grind on your coffee, but once you have it down you won’t have any trouble using this method to make coffee.
Preparation Time: It should only take you about 3 and a half minutes to make coffee using a Chemex brewer. There may be a little additional time added in heating up the water and grinding the coffee, but it’s still a pretty quick cup of coffee.
Difficulty: Takes Some Practice. There are ways to mess up your coffee with a Chemex brewer. You’ll probably take a little time to get used to it, but once you do then it’s no problem to make a good cup of coffee.
Variety: There’s not really any variety when it comes to a Chemex. It’s a glass coffee maker that looks more like a vase than a brewer. They don’t really change from one to the next. You can get them in different sizes, though. There are 3-cup versions as well as 10-cup versions for all of your coffee making needs.
Price: A Chemex coffee maker will cost you $45 to $80 dollars mostly depending on the size you need. Other than the price of the coffee maker you will have to continually buy the paper filters that are unique to this coffee maker.
Taste: Because of the specially made filters, you will end up with a richer tasting coffee than other drip brewers. You will have a nice delicious cup of coffee similar to what you can achieve from a french press without the silt left in the bottom.
Coffee Cone
These brewers are incredibly simple in design while still providing you with a delicious cup of coffee at the end of the process. They are small and easy to take with you when you travel.
A coffee cone is just what it sounds like. A cone-shaped device that is set into the top of whatever you’re serving your coffee out of just like a funnel. They use a paper filter to hold the coffee grounds and water is poured into them, which drips down into the pot you’re using.
How to Use a Coffee Cone:
- Place the coffee cone in the top of your coffee pot.
- Heat some water to a boil and then remove from the heat and let it sit for about 30 seconds.
- Put the paper filter in the cone and pour a bit of water around it to hold it in place and get rid of the paper taste. Discard the rinse water.
- Measure out your desired coffee and grind it to a medium-coarse grind. Or measure out your pre-ground coffee.
- Put the coffee grounds in the coffee cone and give it a shake to even them out.
- Pour your hot water slowly over the coffee grounds to completely cover them.
- Allow the water to filter through the coffee grounds into the vessel below.
- Remove the filter and discard the coffee grounds.
- Remove your coffee cone from your pot and pour your cup of coffee.
There are a lot of coffee cones to choose from, but some of the most popular brands are the Hario V60, the Bee House Dripper, the Melitta, and the Kalita Wave. All of these brands have their own unique design and can affect how your coffee tastes in the end.
Preparation Time: With the time it takes to heat the water and pour it over the coffee grounds, you will generally have a good cup of coffee ready to go in under 5 minutes. Pouring times only take around 3 minutes with a coffee cone.
Difficulty: Easy Peasy. There is little room for error when it comes to using a coffee cone. They take a little getting used to when it comes to pouring your water over top, but not as much as you might think.
Variety: There are so many different types of coffee cones you can choose from. They come in different materials and designs so you pretty much have your pick. You can get a coffee cone made of plastic, metal, or ceramic. They can be a straightforward funnel shape or have spirals around the outside.
Price: Any coffee cone you find is typically only going to cost you somewhere between $5 and $30 dollars. Keep in mind that they do use paper filters so you’ll have to regularly buy them in order to make your coffee.
Taste: Most coffee cones result in a nice clean tasting coffee like other drip brewers. The slower a coffee cone filters the water, the more flavor you’re going to end up with. Most of the time a coffee cone will give you a rich bodied coffee that is incredibly satisfying.
Pressure Brewed Coffee
Using pressure to brew coffee is a popular way to get a fast and intense cup of coffee. It is most commonly used to make espresso coffee, a drink that a lot of people can’t live without. However, there are more ways to make coffee using pressure than just the espresso machine.
Espresso Machine

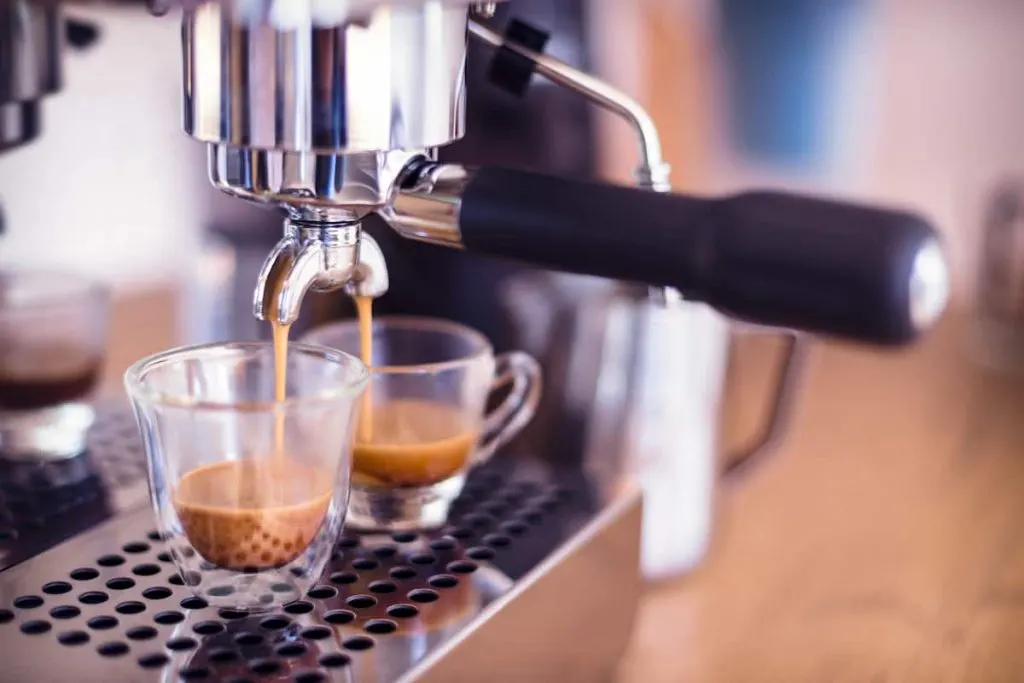
The espresso machine is an all in one machine that makes a super-strong shot of coffee for anyone that needs all that caffeine as quickly as possible. Pressurized water is pushed through fine coffee grounds and then through a filter and into your cup.
There are different kinds of espresso machines available. You can purchase one with a lever that requires you to push the water through by hand or you can buy an espresso machine that does all the work for you so that you can just drink your coffee.
How to Use an Espresso Machine:
- Fill the reservoir with water. Filtered water makes for better coffee.
- Turn the machine on.
- Measure out your coffee grounds and put them in the filter.
- Compress the coffee grounds in the filter so they are nice and compact.
- Lock your filter into the machine.
- Put your cup under the faucet to catch the coffee.
- Press the shot button and let the machine work its magic.
Obviously, every espresso machine is going to have its own set of instructions regarding its use. Always read the manual that comes with your machine and make sure you use it correctly. Otherwise, you might be waiting a little longer for that espresso shot.
Preparation Time: Warm-up time for an espresso machine in your home is around 3 minutes. Once it’s all nice and warm you won’t be waiting any longer than 30 seconds before your shot is in hand.
Difficulty: Easy. The kind of espresso machine you have in your home is probably not going to take a lot of brainpower to operate. They’re designed to be easy for a reason. If you’re trying to operate a larger machine for commercial purposes, there are classes for that.
Variety: There are all types of espresso machines on the market. You can find them in all sorts of makes and colors. With these machines, there’s something to fit every need. You won’t have to worry about getting what you need.
Price: When you’re buying an espresso machine you pretty much get to pay what you want. You’ll probably be paying at least $30 for a useable machine, but the options are endless. There are espresso machines in the thousands. It all just depends on what you’re willing to invest in your coffee.
Taste: A shot of espresso by nature is sharp and strong. Most people mix their espresso shots into other coffee drinks to give it a little extra boost of caffeine. If you don’t mind the intense flavor, though, go ahead and take the shot by itself.
Moka Pot

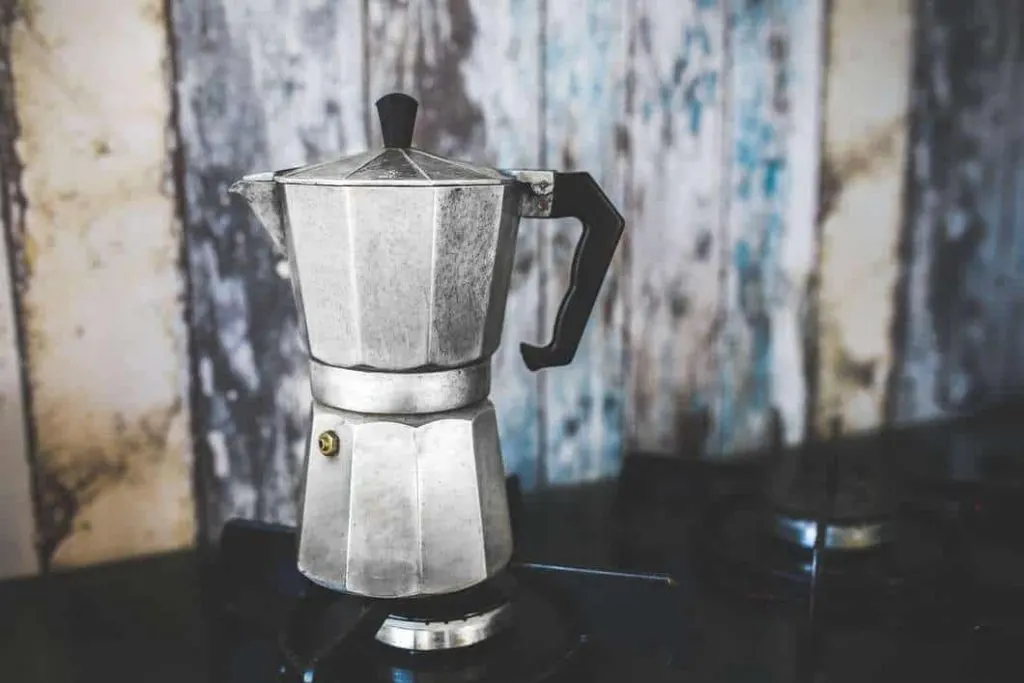
The Moka Pot is essentially a stovetop version of an espresso machine. It uses pressure to produce a similarly strong resulting drink that will get you up and kicking in the morning no problem.
Moka Pots can brew multiple cups of coffee at once for you and all of your friends. It works by boiling water in the bottom chamber of the pot that is pushed up by pressure from steam through coffee grounds in the middle and finally into the very top chamber.
How to Use a Moka Pot:
- Separate the Moka Pot into its three chambers.
- Grind your coffee into a fairly coarse grind to keep the grounds from leaking into the coffee.
- Fill the bottom chamber of the Moka Pot with cold, filtered water. Don’t fill it past the safety valve.
- Fill the filter basket all the way full with coffee grounds. It has to be all the way full in order to brew properly.
- Put the Moka Pot back together.
- Place the Moka Pot on the stove and let it heat up until the water is boiling.
- When you hear a gurgling noise take the pot off of the heat. This is the sound of the coffee being forced up into the top chamber.
- Pour your coffee and enjoy!
These little stovetop devices are a good alternative to using an espresso machine with a comparable result in flavor. They may not be quite the same as the espresso you’re used to, but will still give you a strong coffee to get you through your day.
Preparation Time: From start to finish using a Moka Pot won’t take you more than 5 minutes. You won’t have to wait long for that shot of coffee you’ve been craving.
Difficulty: Simple but Involved. Once you have the process down, it’s easy to get delicious coffee from a Moka Pot. It’s important to keep your eye on it the whole time, though. Once it’s done, it’s done and needs to be taken off the heat.
Variety: A Moka Pot is what it is. Other stovetop espresso makers pretty much look the same. They are all comprised of three chambers and use the same mechanics to pressure brew your coffee.
Price: A Moka Pot will run you anywhere from $20 to $60. It’s not one of the most expensive things and will definitely cost you less than a good espresso machine while still providing you with a nice strong kick of coffee.
Taste: This is as close to an espresso shot as you can get without using an espresso machine. This coffee will be strong and sharp. If you find that your coffee is too weak then your grind is too coarse. If it ends up too bitter then your grind is too fine.
Aeropress
There are a lot of people that swear by the Aeropress and the quality of coffee it generates. This small tool is extremely fast and only requires a few simple ingredients to produce your cup of coffee.
An Aeropress is sort of a combination of immersion and pressure brewing. It is a 3 piece brewer that holds the coffee grounds and water in a chamber to steep. Once the coffee is ready to go you press down on the plunger and air pressure forces the coffee down through a filter and into your cup. It’s as simple as that.
How to Use an Aeropress:
- Bring some water to a boil. Only about 7oz are needed for an Aeropress.
- Measure out your coffee depending on how strong you want your coffee and grind it. What grind you use depends on your preference.
- Insert a filter into the filter cap.
- Use a bit of hot water to secure the filter to the cap. Do this carefully so you don’t burn yourself.
- Put the Aeropress together so it’s ready to go.
- Add your coffee grounds to the Aeropress.
- Pour hot water over the coffee grounds and start a timer.
- After a minute has gone by stir the coffee a few times.
- Fasten the filter cap on your Aeropress.
- Turn the Aeropress over your coffee cup and apply pressure, forcing the coffee through the filter.
An Aeropress is good for anyone that travels a lot but still wants a quality cup of coffee. It’s a cool device that results in a smooth taste that some people say is their favorite coffee ever.
Preparation Time: Once your water is hot, it’s possible to make coffee using an Aeropress in under a minute. This style of brewing coffee is extremely fast, which is why it’s favored by so many people.
Difficulty: So Easy it’s Weird. There’s really nothing that can trip you up when you use an Aeropress to brew your coffee. You may even want to challenge yourself by trying out other methods using your Aeropress if you get bored.
Variety: The Aeropress is a single device that is the same no matter what. It’s made to work in a certain way so it doesn’t change all that much. If you’re looking for an Aeropress you’re probably more worried about how fast you can make coffee rather than style.
Price: You can find an Aeropress for $20 to $50. They do have disposable filters so you will have to regularly buy new ones to use in your Aeropress.
Taste: An Aeropress will give you an incredibly smooth and clean tasting coffee. It’s said to be extremely pure in taste on top of being quick to make.
Boiled Coffee
This is the most straightforward way to brew your coffee. It’s exactly what it sounds like – boiling coffee in water. All that’s really necessary to make boiled coffee is to have a container, some water, and coffee grounds. This is perfect if you have no coffee maker on hand.
Campfire Coffee


While camping you may not have thought to bring any coffee making equipment with you. In this case, all you really need is a pot, some water, and ground coffee. It’s a tried and true way of making coffee like a cowboy, no fuss necessary.
How to Make Campfire Coffee:
- Fill your pot with some water.
- Put the pot over the campfire to bring it to a boil.
- Throw in your choice of ground coffee.
- Remove the water from the heat and let it brew for a few minutes.
- When the coffee grounds have settled to the bottom, slowly pour your coffee in your cup.
Of course, you’ll need to use a coarser grind of coffee for this method. If you use finely ground coffee you’re just going to end up with coffee soup and a mouth full of silt. But for something easy and accessible, go ahead and give this method a try.
Preparation Time: Making coffee this way will take you at least 10 minutes. You’ll need time for your water to boil, at least 4 minutes for it to brew, and another few minutes to let the grounds settle. Pouring the coffee takes a little longer as well because you have to be slow and steady with it.
Difficulty: Very Easy. You’re essentially just boiling water and throwing something into it. There’s no fancy machinery to fiddle with here.
Variety: You campfire coffee is pretty much just how it comes. Unless you brought along some cream and sugar you’ll probably be drinking it black. But at least you get to choose what kind of coffee grounds you’ll be adding.
Price: How much is your favorite coffee? There you have it. No hidden fees in this one.
Taste: There are so many things that can change how your campfire coffee ends up tasting. How long you brew it, how coarse your grind is, and other factors can make a difference in the taste. On the whole, it should still provide you with a good drinkable cup of coffee.
Turkish Coffee
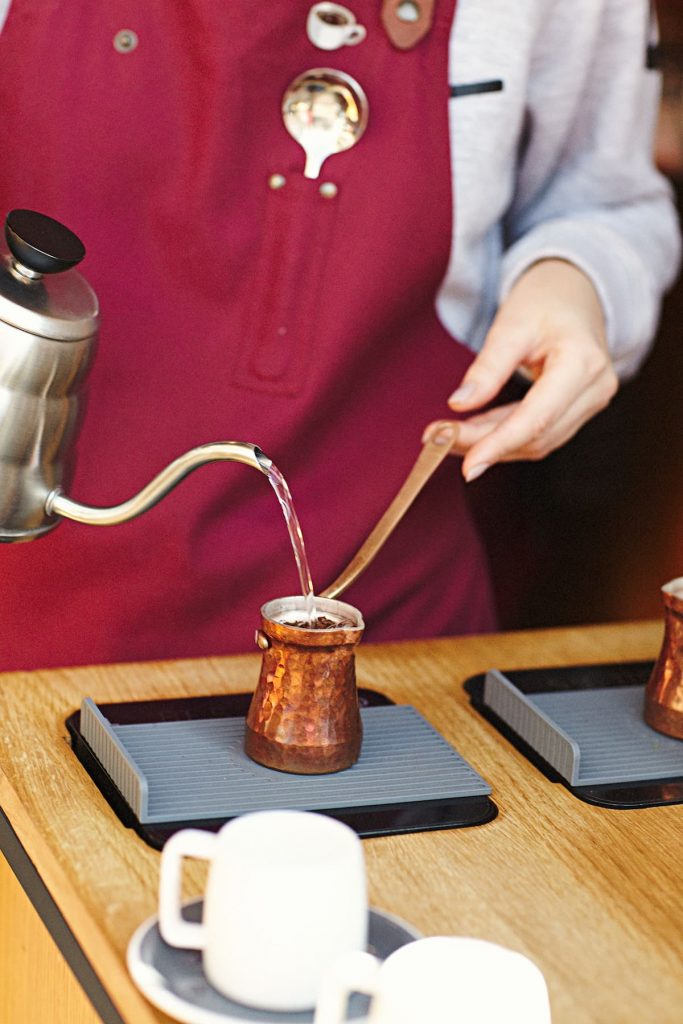

Turkish coffee has a flavor all its own that you’re either going to love or hate. It is a strong flavor that results in a thick foam on the top which some people can’t get enough of.
The easiest way to make Turkish coffee is with a Turkish coffee pot and a good grinder. It works by simmering the coffee grounds multiple times during the brewing process. That’s how it gets such a strong flavor.
How to Make Turkish Coffee:
- Grind your coffee extremely finely or buy already ground Turkish coffee. This coffee is ground much finer than some grinders allow so you may have to purchase a Turkish grinder to get the job done.
- Measure out the amount of cold filtered water you will need and put it in the Turkish Coffee pot.
- Add a heaping tablespoon full of coffee grounds to the pot per 3oz of water. Allow it to sit and float on the surface.
- Add the desired amount of sugar but still don’t stir. Allow it to heat up first.
- When the coffee grounds begin to sink and the water is warm enough for the sugar to dissolve, give it several stirs. Turn the heat down.
- Stir until your coffee begins to foam.
- Turn the heat down some more and keep an eye on it. Don’t let your brew boil or the foam will not form as it should.
- As the brew heats up the foam will rise. Move it away from the heat source to let it cool some and then replace it.
- Your brew should heat and cool 2-3 times before it is finished.
- Pour the coffee into the cups and make sure each cup has an equal amount of foam.
Making Turkish coffee is an art of its own and requires special equipment to get it right. However, there are people that swear by the taste of Turkish coffee and can’t get enough of it.
Preparation Time: Despite the process seeming involved, brewing a cup of Turkish coffee shouldn’t take you anymore than 5 minutes.
Difficulty: Easy to Get Used To. The process is straightforward and as long as you follow the instructions you shouldn’t have a hard time learning how to make perfect Turkish coffee.
Variety: Turkish coffee pots are most often made out of metal. They are all fairly similar in size and shape. You can vary the taste of your coffee depending on how much sugar you add at the beginning of the brew.
Price: You can purchase a Turkish coffee pot from $5 to $30 depending on the quality of it. If you’re going to be making a lot of Turkish coffee then you may want to invest in a nicer one so that it holds up longer.
Taste: A cup of Turkish coffee is a strong-tasting cup with a thicker consistency than traditional coffee. If you like a more intense cup of black coffee then you’ll probably love it.
Make Coffee Your Way
As you can see there is an incredible amount of ways you could go about making your coffee in the morning. It’s impossible that there isn’t one perfect coffee making method for everyone.
You can make your coffee fast or slow and use pre-ground coffee or grind it fresh yourself. There are options for every sort of lifestyle and personality. It’s like a treasure trove of delicious coffee just waiting to be mined.
Now that you’ve seen all of these methods and what they entail, you can figure out which one will work the best for you to get you that much-needed caffeine every morning.
More Coffee Articles

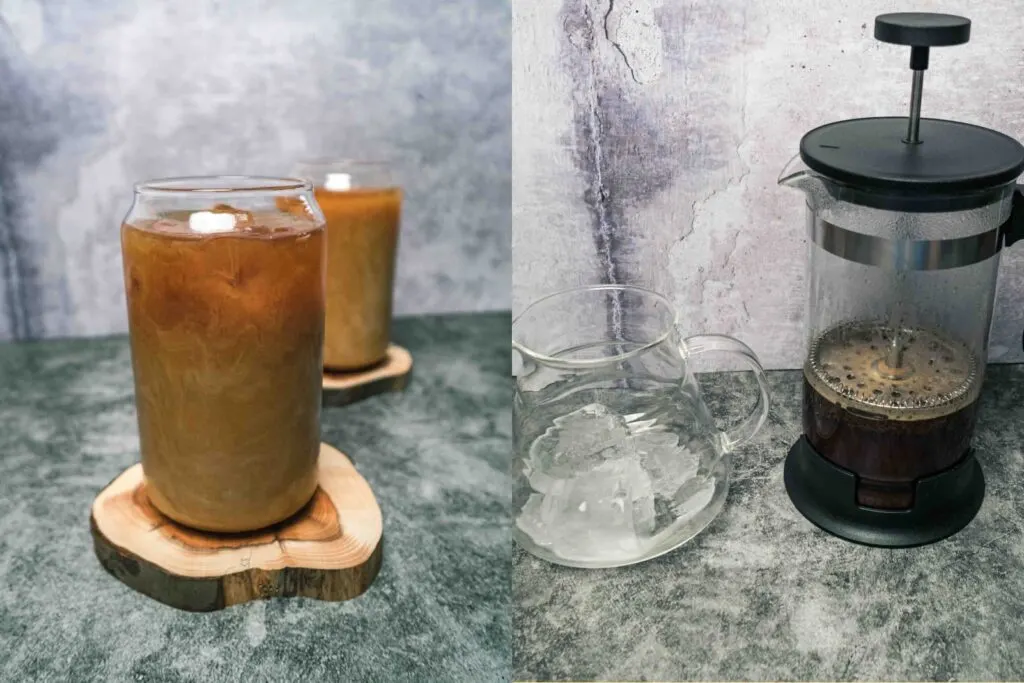
French Press Japanese Iced Coffee – Quick and Simple Recipe
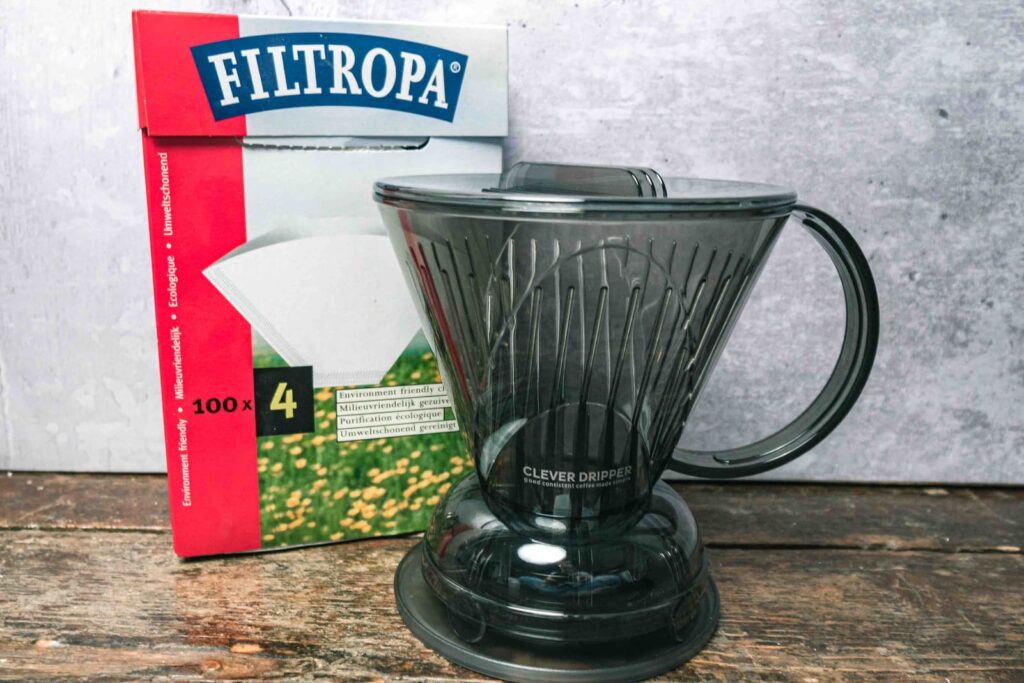

Easy Guide on How To Use Clever Dripper
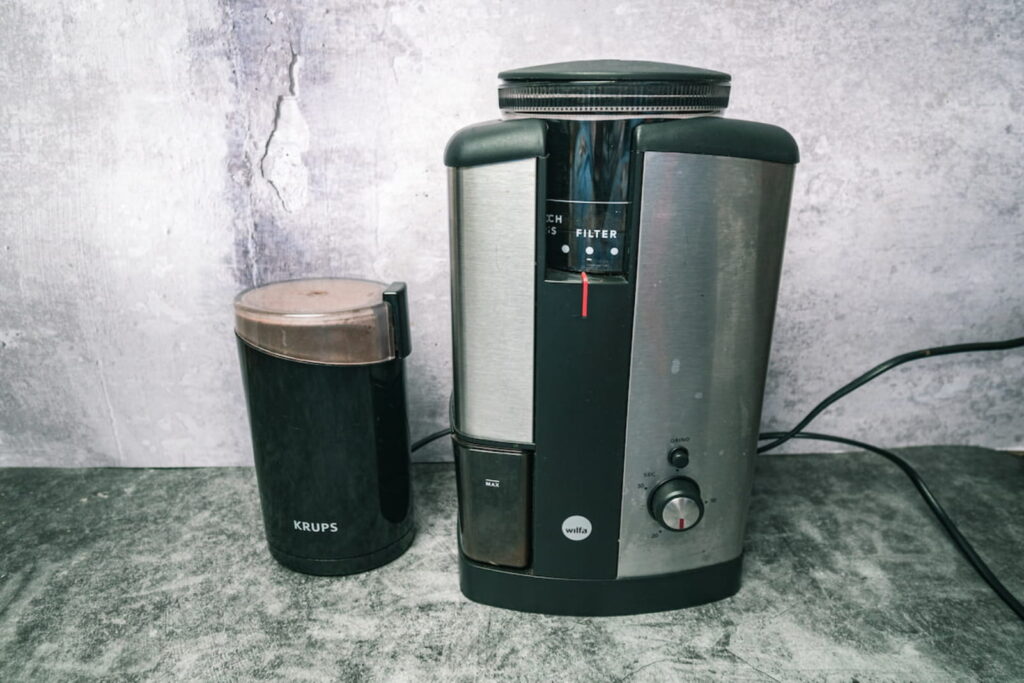
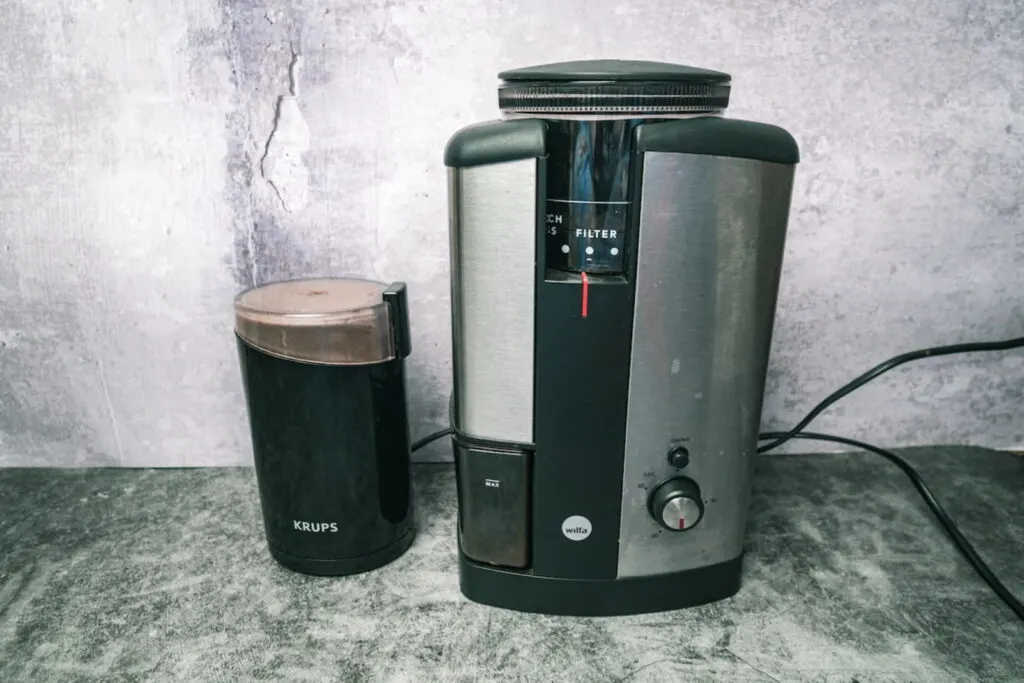
Burr Grinder vs. Blade Grinder: Which Is Better?
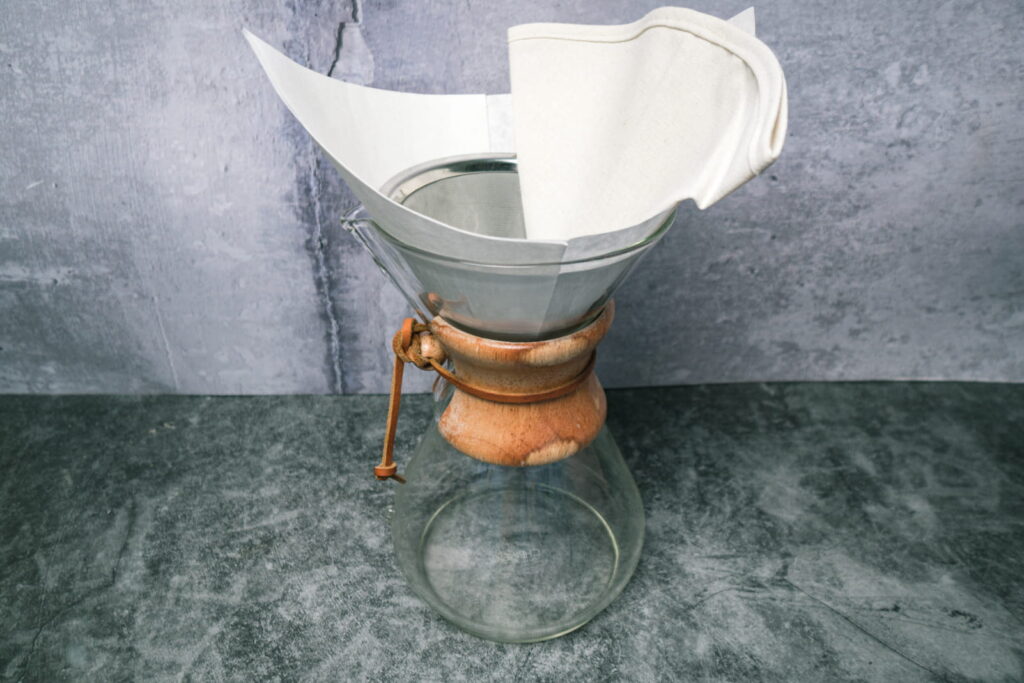
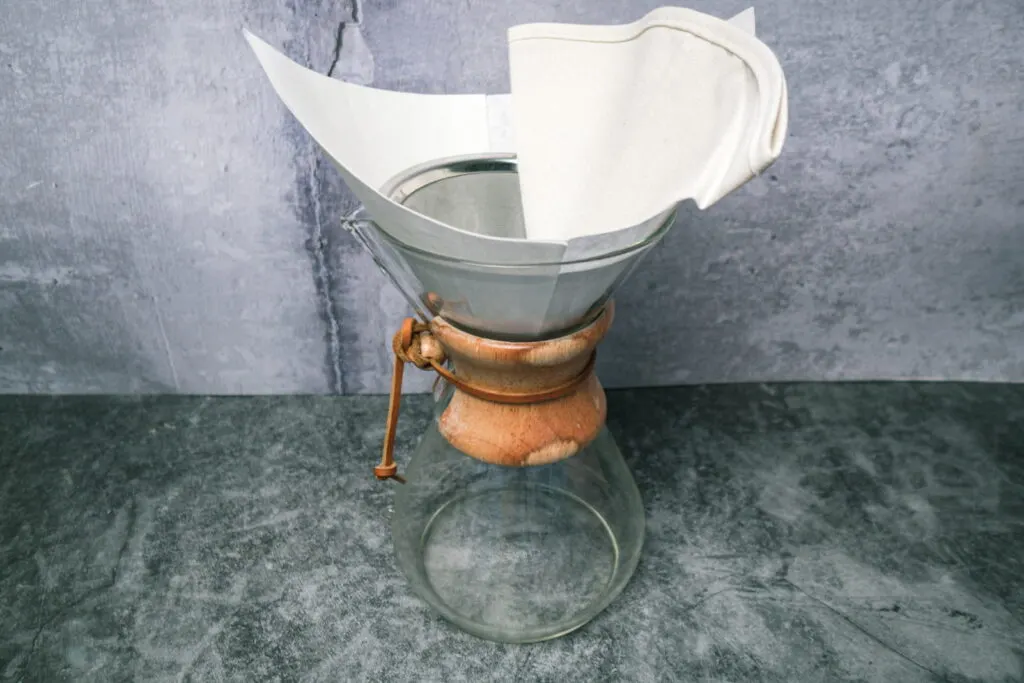
Chemex Filters: Paper Vs. Metal Vs. Cloth (Which is Better?)
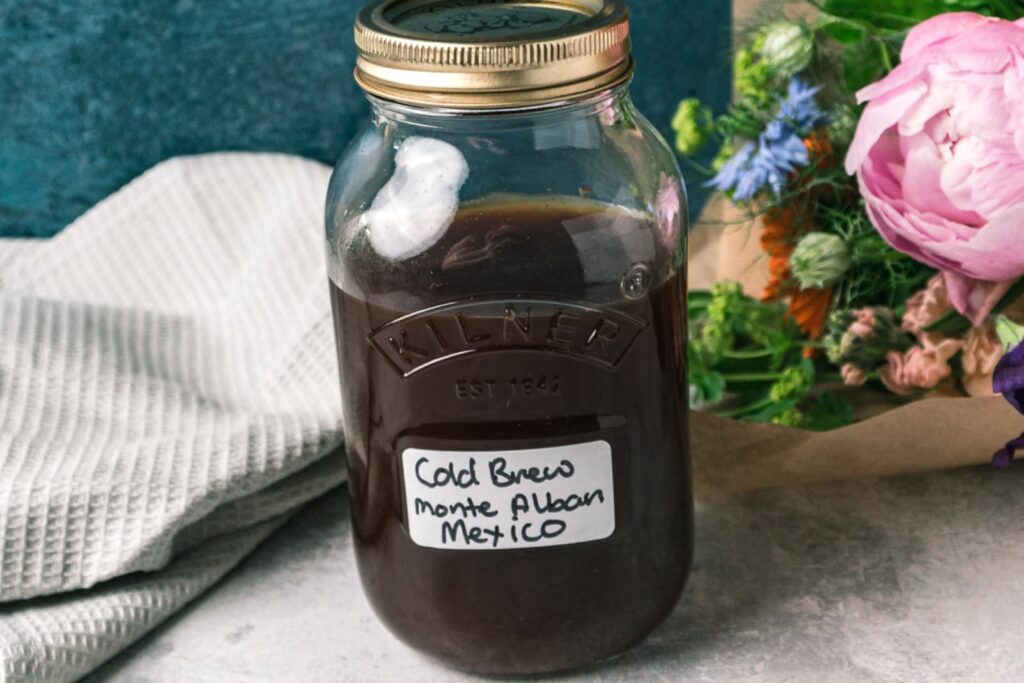

DIY Mason Jar Cold Brew: Here’s How