
Coffee percolators are one of the more common at-home brewing methods in the United States, alongside instant coffee and french presses.
It takes about six cups of coffee in five minutes, which is a little slow for this kind of brewing method. Coffee percolators are also relatively inexpensive. Their price points range anywhere from 10 dollars to 45 dollars, depending on the type of percolator it is.
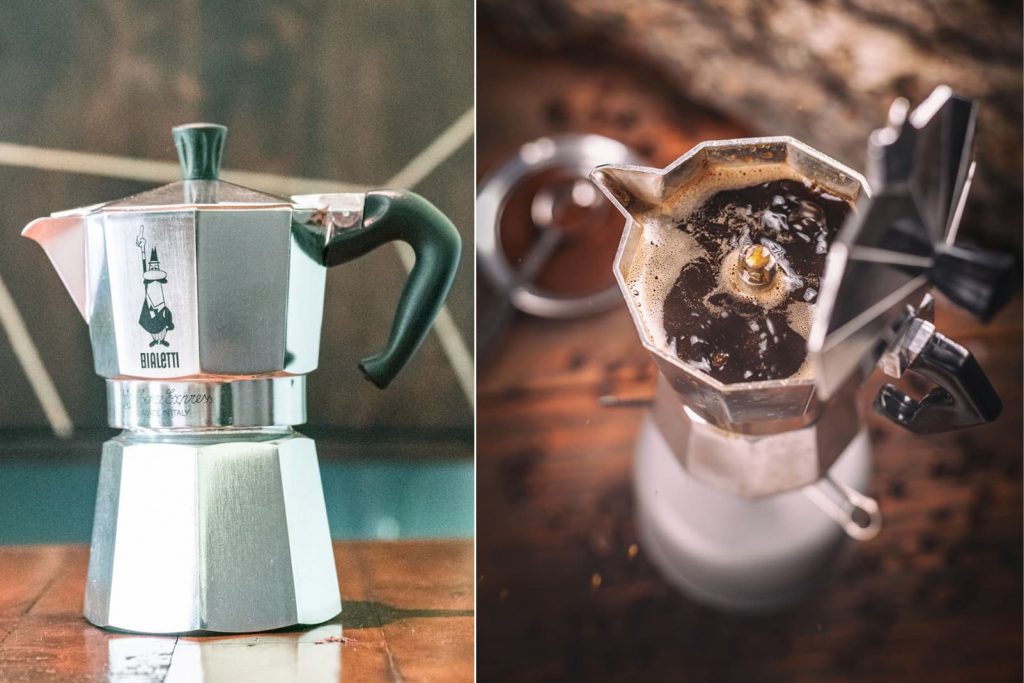
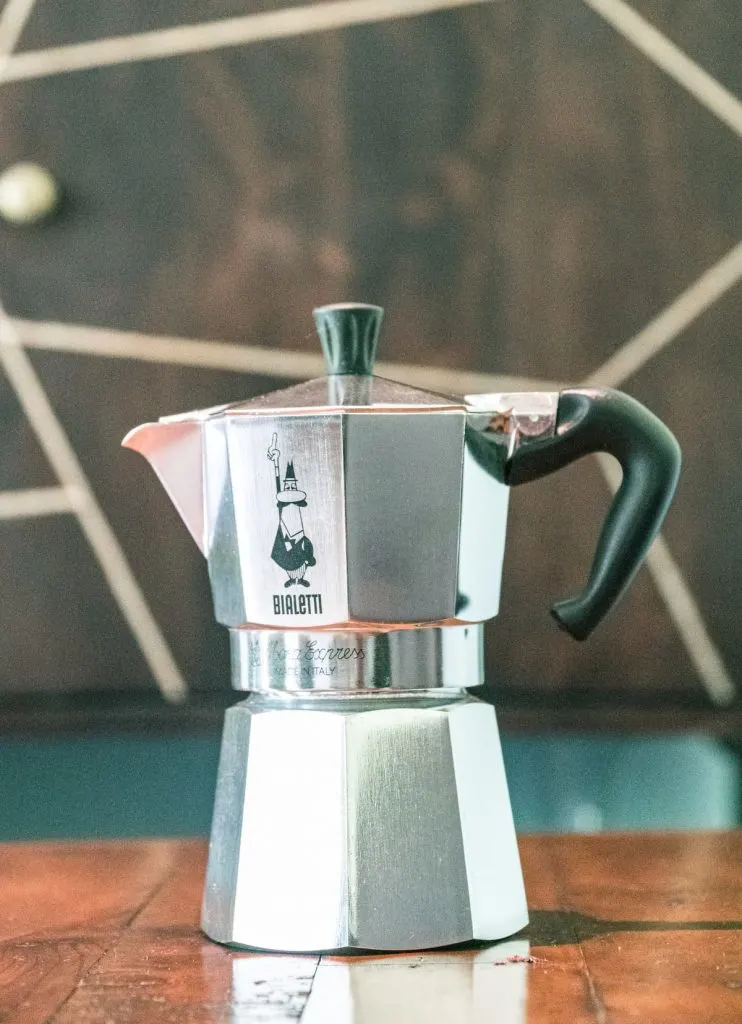
There are two kinds of percolators: stovetop and electric. The stovetop percolators are typically made from metal. They work by heating up on the stovetop, as you could probably tell from their name. Stovetop percolators have to be watched carefully because if it over-boils, it could ruin the whole coffee by making it too bitter.
Disclaimer: Hi! this post may contain affiliate links which will take you to online retailers that sell products and services. If you click on one and buy something, I may earn a commission, see my Affiliate Disclosure for more details.
Electric percolators can also be made from stainless steel or glass. They are heated up from a hot plate that’s powered when you plug it in. Electric percolators also automatically stop when the coffee is done with the brewing.
How to Use a Coffee Percolator:
The word “percolate” means to flow through, which is what a percolator does exactly. Percolators run by flowing water through the whole pot and through the coffee grounds. There is a lot that goes into a percolator, and it requires a lot of attention to make sure that it makes the right kind of coffee for you.
The Parts of the Percolator:
Coffee percolators have a few different parts to them, which can make them seem a little intimidating to use compared to an instant coffee maker. But rest assured, percolators are one of the easiest out of the classic brewing devices to use.
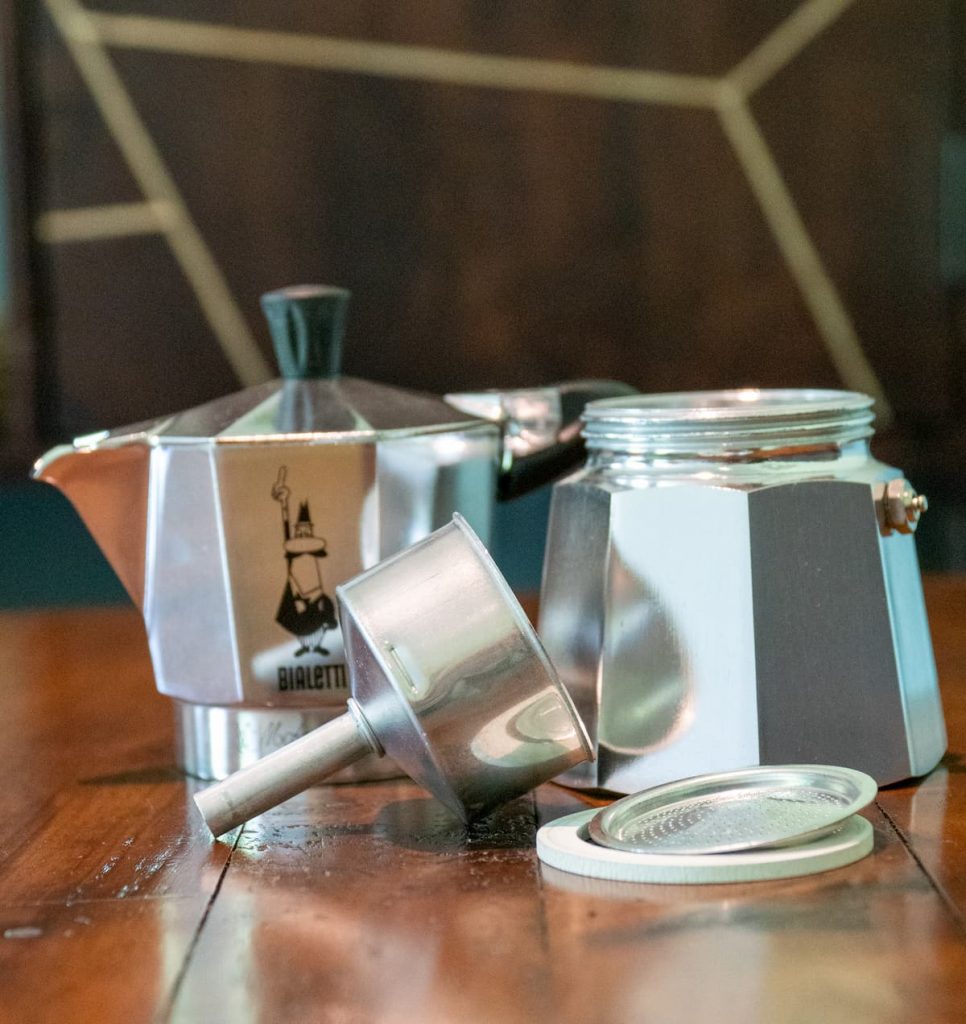

Cover Knob:
Depending on what kind of percolator you have, the cover knob is a plastic or glass piece that sits at the top of the percolator that lets you see into it. It enables you to see the color of the coffee and to watch the water boiling to make sure the coffee comes out just right.
However, some metal percolators don’t have a see-through cover knob and are just metal covers that you can just pull off. The translucent cover knob is preferred for stovetop percolators to make sure that they don’t overboil.
Spreader Cover:
The spreader cover is found at the top of the basket inside of the percolator. It has a hole in the middle of it which fits the pump stem. The spreader cover also has lots of holes throughout it to create a shower-effect onto the coffee grounds and also helps to stop the coffee grounds from splashing during the process.
Basket:
Like the spreader cover, the basket also has a hole in it to fit the pump stem and also holes throughout it to keep the water flowing through. You can also use coffee filters that are specially made to fit the basket to stop fewer grounds from flowing out and make the coffee taste smoother, but it’s not necessary.
Pump Stem:
The pump stem goes through the middle of the pot from the bottom to the top of the percolator. It acts as a nonmechanical pump that makes the whole system work. The pump stem does require some good upkeeping or else the whole percolator won’t work.
What You Need to Start Brewing:
Coffee percolators are actually pretty simple to use, all you need are the following:
- A clean percolator
- Your preferred ground coffee (you can also get coffee beans and grind them yourself)
- Water
- Heat (from either the stovetop or an electricity source for your electric percolator)
Steps:
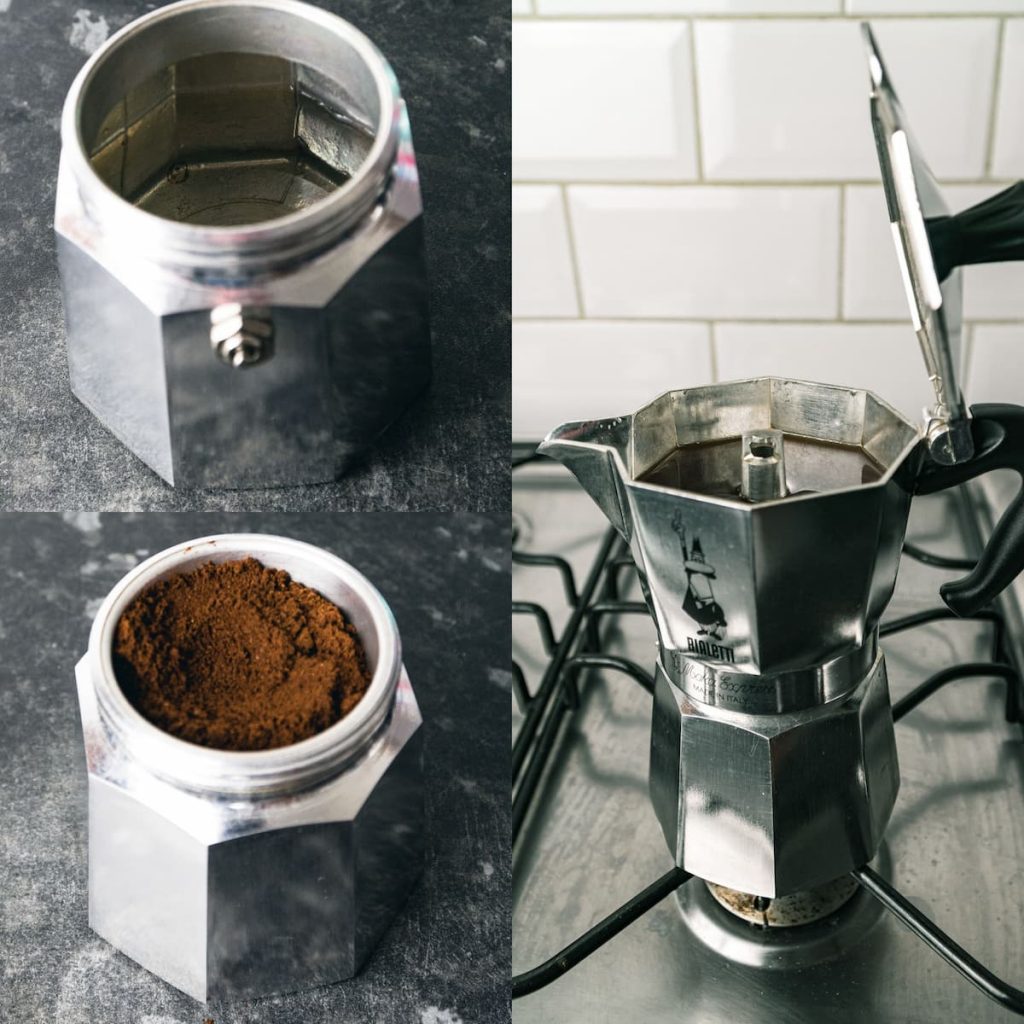
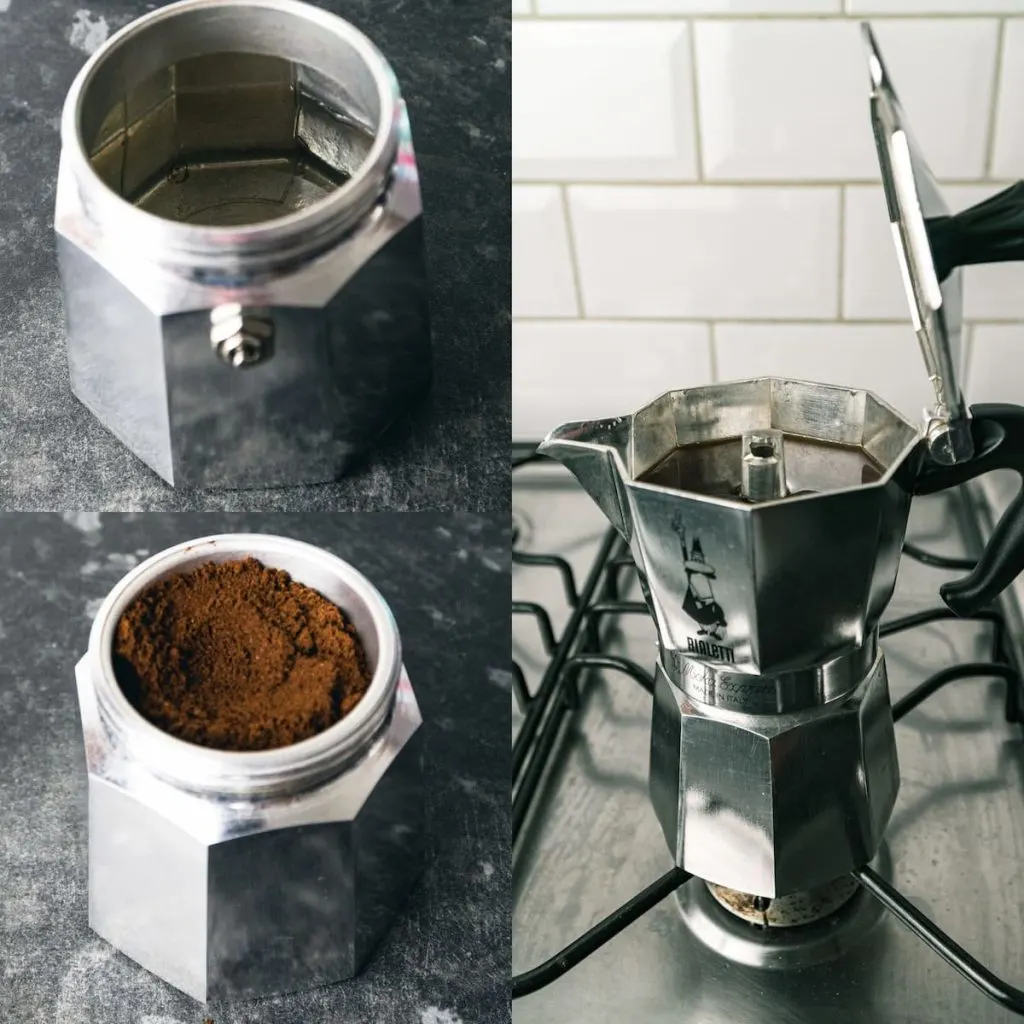
- Clean the percolator before you start brewing. Because percolators can leave some residue behind, it’s important that you make sure it’s clean so that the old coffee grounds don’t get mixed up with the fresh ones, changing the taste of the coffee.
- Measure your coffee and water before pouring them into the percolator. The taste of the coffee is very dependent on these variables, so measuring everything out beforehand is a smart idea. Everyone has their own ratio preference, and it may take some time to find yours, but generally, the ratio is one tablespoon per eight ounces of water to make six cups.
- Ideally use distilled or filtered water and boil the water you plan on using as this will speed up the process.
- Pour the boiled distilled or filtered water into the percolator. The metal base will become hot so do be careful.
- Pour the coffee grounds into the basket and pack them in with the back of a coffee spoon, so they’re tight.
- Attached the pump stem and the spreader cover and insert it into the percolator.
- Turn on the stove to medium heat and put the cover knob on top.
- Watch the percolator, so it doesn’t overboil. I listen out for the hiss and let it go for another 3-5 seconds and then turn off the heats.
- Remove the percolator from the heat source, whether it be the stove or if it’s electric, and let it sit for a few minutes. It will be extremely hot, so be careful.
- If I am using a stove top percolator, I like to run the base under some cold water to ensure it doesn’t make the coffee bitter. Do be careful as there will be hot coffee in the top.
- Pour it into an espresso cup and enjoy!
Tips for Using the Percolator:

Using a percolator is easy, but it does take a lot of practice to make the right kind of coffee for you. Here are some tips to help you get the best coffee that you can while using a percolator:
- Make sure the percolator is clean. If the percolator isn’t properly cleaned from its last use, it could make the next batch taste off.
- Grind your own beans. Buying whole coffee beans and grinding them yourself right before brewing them will make a world of difference. You can’t beat the taste of freshly ground coffee beans.
- Use distilled or filtered water. Sometimes tap water, depending on where you live, can have metals in it that will disrupt the taste of your coffee. Using filtered or distilled water will guarantee fresh and pure water for your coffee.
- Percolators make really strong coffee, so if you prefer a lighter brew, make sure you get a lighter roast of coffee grounds. You can also use fewer coffee grounds in your brew, but too much water can make it too watery.
- Keep an eye on the color and the boil. Once you get a knack for how you like your coffee done, you’ll become familiar with what it looks like in the percolator. Keep a constant eye on it so you can get it just right and so it doesn’t overboil, making it bitter.
- Remove it from heat as soon as it’s done. Removing it from the heat right away will prevent it from still cooking even after you have turned it off.
Pros and Cons of Coffee Percolators:
Pros:
- Taste: Percolators produce very strong and bold tasting coffee.
- Control: Because you have control over the brewing time and how much coffee you use, you have more control over the taste so you can always get the cup you prefer.
- Inexpensive: Coffee percolators are incredibly inexpensive. You can find them at local home goods stores or even online. They are a great cost-effective option for if you want to get a little fancier with your coffee beyond instant coffee.
- Portable: Percolators, especially stovetop ones, are very portable. Electric percolators are great for traveling, and hotel stays, so you’re able to make your favorite cup of coffee away from home and don’t have to settle for the lousy hotel coffee. Stovetop percolators are also great for camping because you can heat them over the fire.
- Durable: Percolators also have a really durable design, which is great for traveling. Even if a piece does break, you don’t have to replace the whole machine. You can always just replace the part that broke, unlike a coffee machine for instant coffee.
Cons:
- Overboiling: It is easy to overboil the water in a percolator, ruining the whole pot of coffee. Overboiling causes the coffee to come out extremely bitter and most really drinkable. Electric percolators now have an automatic timer that shuts off the pot when it is finished to prevent overboiling. Stovetop percolators, on the other hand, require more attention.
- Practice: Mastering the percolator takes time and practice. You probably won’t get the perfect cup of coffee the first time you use one, so that means you’ll probably be wasting a good bit of coffee before you get it right. Everyone likes their coffee differently, so it will take some time to figure out the right combination of water temperature and coffee to figure out how to get to your perfect cup.
- Cleaning: Cleaning a percolator can be a very tedious task. You have to take apart the whole system in order to clean it properly. It’s important to properly clean it because if there is any residue left, it could affect the way the coffee comes out or could cause the percolator not to work properly.
- Slow: Compared to other brewing methods, coffee percolators take longer to brew. The French Press, for examples, takes about four minutes to make eight cups, whereas percolators take up to five minutes to make six cups.
Conclusion:
Even though they may seem fancy and intimidating, coffee percolators are relatively easy to use and is a great tool to make coffee. Percolators have been around for years but have lost their popularity when instant coffee really picked up. But percolators have a vintage style and is such a simple way to make coffee that they should really make a comeback.
Whether or not you are a seasoned coffee drinker or a newcomer into the world of coffee, you’ll definitely find yourself loving the coffee that you can brew with a coffee percolator.